Monday, February 24, 2014

Homemade Vanilla Yogurt

I was initially turned off by the idea of making yogurt at home thinking I would need special equipment and tools. Boy, was I wrong! The only thing special that I use is my candy thermometer (essential for increased chance of success) and the cultures that I put in my yogurt. But even that isn't necessary, using a good quality plain yogurt without any additives will do the trick as well. I find that I get a thicker yogurt with the cultures that I order from the New England Cheesemaking Company and have had no issues with my yogurt setting. The store bought plain yogurt is a little more finicky, at least it is for me.

One more added tidbit that I absolutely love about this yogurt is I know exactly what is in it, no surprises here. Just milk, sugar (which is optional), vanilla bean and cultures.
I love the vanilla bean flecks in this yogurt!
Homemade Vanilla Yogurt
Ingredients:
  • 1-2 quarts (4-8 cups) milk, whole or 2% preferred
  • 1/3 cup sugar per quart of milk (optional)
  • 1 vanilla bean
  • 1 packet of yogurt culture or 3 tablespoons per quart of plain yogurt (make sure it has active cultures and no additives, Dannon makes a good one)
  • clean mason jars
  • candy thermometer or instant read thermometer
Directions:
-Place milk and sugar (if using) into a pot. Cut the vanilla bean in half length wise. Scrape the inner beans out and add both the pod and beans to the milk. Whisk to combine. Heat milk to 185 over medium low heat stirring occasionally. Turn heat off when 185 degrees is reached.
-Cool milk to around 110 degrees. While the milk is cooling, turn oven on for 2-3 minutes, then turn off. Sprinkle the culture or add the starter yogurt, let sit for 2 minutes before stirring. Stir to incorporate the culture.
-Pour milk into clean jars. Cover and place in the oven with the light turned on, make sure the oven is off! Leave the milk undisturbed for at least 6 hours and up to 24 hours, I prefer over night.
-Check one jar to see if it has set. When the yogurt is set, place in the fridge. Use within 14 days.

Yield: 8 cups of yogurt

Note: If your yogurt does not set, don't throw it out. You can still use it for smoothies and baking. Start out making one quart at a time until you are comfortable with your technique and results.

Thursday, February 20, 2014

Ravioli Lasagna

Lasagna used to be a weekend only meal for my family but it has become a weeknight favorite with this recipe. My ravioli lasagna is a variation of Rachael Ray's recipe. Her recipe is delicious but very involved. I wanted something easier that I could prep and bake in less than an hour. This is far from gourmet but delicious nonetheless. Pair it with a green salad and some crusty bread drizzled with avocado oil and you've got yourself one heck of a meal.
Ravioli Lasagna
Ingredients:
1 bag of frozen ravioli (about 25 ounces)
1 jar of your favorite tomato sauce
8 ounces shredded mozzarella (about 2 1/2 cups)
1-16 ounce container of ricotta or small curd cottage cheese
1 egg
2 tablespoons Romano cheese
1/2 teaspoon ground black pepper
handful spinach, chopped
1/4 teaspoon of garlic powder

Directions:
Preheat oven to 400. Mix the ricotta (or cottage cheese), egg, Romano, black pepper and spinach in a medium bowl. Place 1/2 cup of sauce on bottom of a 3 quart casserole dish (my glass Pyrex dish works perfect). Layer half of the ravioli on top of the sauce. Top the ravioli with half the cheese mixture, sprinkle with 1/2 the shredded cheese. Repeat. Sprinkle garlic powder on top.
Cover with foil and bake for 35 minutes. Remove foil and bake for an additional 10 minutes.
Let sit for 15 minutes before serving.

Yield: 6 servings

Our favorite ravioli to use is a portabella mushroom with a tomato basil sauce. You can easily add ground beef or turkey to this dish for the meat lovers out there. A half pound of ground turkey and a half pound of Italian sausage tastes awesome with the ravioli.

Pin It

Saturday, February 15, 2014

Cinnamon Raisin Rolls

We had a few snow days last week and on snow days I love to bake. The heat from the oven warms up part of the house and the delicious smells make being stuck inside a little easier. These cinnamon rolls make a regular appearance on these days. I like to get them all prepped the night before and bake them fresh the next morning for a warm breakfast treat.
Cinnamon and raisin is the best combo!
Cinnamon Raisin Rolls
Ingredients:
  • 1 1/4 cup warm milk
  • 1/2 cup sugar
  • 1 tablespoon yeast
  • 1 egg
  • 1/3 cup vegetable oil
  • 2 teaspoons vanilla extract
  • 1 teaspoon salt
  • 1 cup raisins
  • 4-5 cups flour
Filling:
  • 1 cup brown sugar
  • 3 tablespoons ground cinnamon
  • 1 tablespoon cornstarch
  • 1/2 cup (one stick) butter, softened
Directions:
1. In mixing bowl of stand mixer combine milk, sugar and yeast. Allow to sit for 5 minutes. Whisk in egg, oil, vanilla and raisins. Add in 2 cups of flour and mix using the hook attachment, continue adding flour 1/2 cup at a time until the dough has reached a slightly tacky texture but it does not stick to your hands. Mix for another 5 minutes, until dough is smooth and elastic. Place dough in an oiled bowl, cover and let rise for about 1 hour.

2. While dough is rising, mix the brown sugar, cinnamon and sugar in a bowl. Set aside.

3. When dough has doubled in size, transfer dough to a lightly floured surface. Roll dough into a 16x20 rectangle for large, Cinnabon like, rolls. Or divide in two and roll into rectangles about 14x18.

4. Spread butter on to dough then sprinkle cinnamon mixture evenly over butter.
Starting from the long edge, roll the dough making sure to pinch the seams . Cut into 12 even pieces (or 24 pieces if making the smaller rolls).
Place rolls evenly into a lightly greased 9x13 baking pan (two 9x13 pans for 24 rolls) and let rise another 30 minutes.

5. Preheat oven to 350. Bake rolls for 20 minutes, rolls should be golden brown when done. Cool upside down on a cutting board for approx. 5 minutes. This lets all the yummy gooey filling soak back into the rolls.

Yield: 12-24 rolls

Note: These can be made up to step 4 the night before but skip the 30 minute rise and just stick them in the fridge. In the morning, just preheat the oven and bake for 20-25 minutes.

Pin It

Tuesday, February 11, 2014

Tuna Antipasto

This tuna and bean salad is light, refreshing and so quick to prepare. There is no mayo involved so its perfect for those summer picnics! This salad is tasty on a bed of greens or stuffed into these homemade pitas for a no-utensils-needed meal. 
 
Tuna Antipasto
Ingredients:
  • 1 can of garbanzo beans, drained
  • 2 small cans of tuna, drained
  • 1/2 bell pepper, diced (the red ones look pretty in this salad)
  • 1/2 small onion, diced
  • 1 heaping tablespoon of capers
  • 1/4 cup lemon or lime juice
  • 2 tablespoons olive or avocado oil
  • 1 tablespoon Worcestershire sauce
  • 1 tablespoon Dijon mustard
  • salt and pepper to taste
Directions:
Combine everything but the tuna into a medium bowl. Mix well. Add tuna and toss just until combined. Chill until ready to serve. I like this salad better the next day when all the flavors have had a chance to meld.

adapted from Eating Well

Yields: 4 servings

Pin It

Monday, February 10, 2014

Vanilla Butter Cookies

I have been brewing up some homemade vanilla extract and wanted to bake something that would highlight the vanilla. I did a quick search online and found this gem of a recipe. I don't know if I ate more of the dough or the actual baked cookies, both were sinfully delicious!
Only 30 minutes from start to finish!
Vanilla Butter Cookie (adapted from Food.com)
Ingredients:
  • 1 cup butter, softened
  • 1 cup sugar
  • 1 large egg
  • 1 1/2 tablespoon vanilla extract
  • 1/4 teaspoon salt
  • 2 cups flour
Directions:
Preheat oven to 350. Line cookie sheet with parchment or silicone mat.
Cream the butter and sugar in the bowl of a stand mixer.
Add the egg, vanilla and salt, beat well. Mix in flour one cup at a time.
Drop by rounded teaspoonfuls about 2 inches apart onto prepared cookie sheet.
Bake for 10-12 minutes, until edges start to brown. Cool on rack.

Yield: about 3 dozen

Want to try and go vanilla overload by using vanilla sugar the next time I make these!

Pin It

Friday, February 7, 2014

Spicy Sesame Noodles

We are adding some heat to our winter nights with this yummy dish. These noodles compliment almost any protein you desire, our favorite is miso poached tilapia!
Spaghetti and linguine work well for this dish,
we enjoy the whole wheat noodles best!
Spicy Sesame Noodles
Ingredients:
  • 8 ounces dry pasta
  • about a 1/4 cup good quality sesame oil* (a little less will work, but I really enjoy the sesame flavor)
  • 2 tablespoons chili oil (use more or less according to heat tolerance, this has a pretty good kick)
  • 2 tablespoons honey
  • 2 tablespoons soy sauce
  • 1 carrot, peeled and shredded
  • 1/2 cup green onion, sliced
  • 1 large handful cilantro, chopped
Directions:
Cook noodles according to directions. While noodles are cooking, whisk both oils, honey and soy sauce together. Set aside. When noodles are done, turn off heat, drain noodles and return them to the hot pot. Re-whisk sauce and pour over noodles. Toss to coat. Cover and let sit for 2-3 minutes, allowing the noodles to soak up all the delicious flavors.
When ready to serve, add the remaining ingredients, toss to combine.
This can be served warm or cold, its awesome either way!

Yield: 4-5 servings

*The star of this dish is the sesame oil so it is important to use a good quality oil. In some Asian markets you can find a Sesame oil that is already infused with chili, feel free to use that instead of the two separate oils.

Add a tablespoon or two of peanut butter to the sauce for a yummy twist!

Pin It

Wednesday, February 5, 2014

Chicken Adobo (aka Soy Sauce Chicken)

This Filipino dish is one of my favorites from my childhood, and is now a favorite of my son's (he has dubbed it Soy Sauce Chicken). No matter how bad my day was, as soon as I smelled the aroma of soy sauce, vinegar and garlic wafting from the kitchen, all was right in the world. Chicken adobo is still something I request when my Mom comes to visit because, let's face it, I will never be able to make it as good as Mom. But, I have to say, this is a close second. Usually this dish simmers for a bit, but I cheated and came up with a pressure cooker option, about 15 minutes from start to finish! I'll include directions for both.
I love the juices poured over my rice.
Chicken Adobo
Ingredients:
               Traditional                               Pressure cooker
  • 3-4 chicken breasts                   3-4 chicken breasts
  • 3 russet potatoes                       3 russet potatoes
  • 1/2 cup white vinegar               1/3 cup white vinegar
  • 1/2 cup soy sauce                     1/3 cup soy sauce
  • 2/3 cup chicken broth               1/3 cup chicken broth
  • 3-4 garlic, crushed                    3-4 garlic, crushed
  • 3 bay leaves                              3 bay leaves
  • 1 teaspoon pepper*                  1 teaspoon pepper*
*This dish usually calls for whole peppercorns but my family prefers ground pepper. You can use whole peppercorn if you prefer.

Directions:
Traditional Method: Cut chicken breast into 1 inch chunks and the potatoes a little larger than the chicken. Brown chicken in a large saucepan over medium high heat.
Add the remaining ingredients and bring to a boil. Reduce heat and let simmer for approx. 45 minutes, until chicken is tender. Serve over rice with steamed broccoli on the side.

Pressure Cooker: Cut chicken breast into 1 inch chunks and the potatoes into sixths. Brown chicken in the pot of pressure cooker. Add remaining ingredients and cover pressure cooker to seal. Cook for 8 minutes once high (15 psi) is reached then quick-release the steam (do so according to your cooker's manual). Serve over rice with steamed broccoli on the side.

Yields: 4 large servings

This is a wet chicken adobo with lots of juices to pour over the rice. If you like, you can also remove the chicken and potatoes once cooked and continue to reduce the juices until thickened slightly. The flavor will be super concentrated this way and makes a great sauce for rice bowls.
Pin It

Monday, February 3, 2014

Roasted Tomato Soup

A go-to comfort food of mine is a grilled cheese sandwich with a bowl of warm tomato soup. Tomato soup is very simple to make and so customizable as far as flavors go. This recipe is fresh tasting and makes the house smell so delicious. Add shredded chicken or a sprinkle of fresh basil and parmesan to bring it over the top.
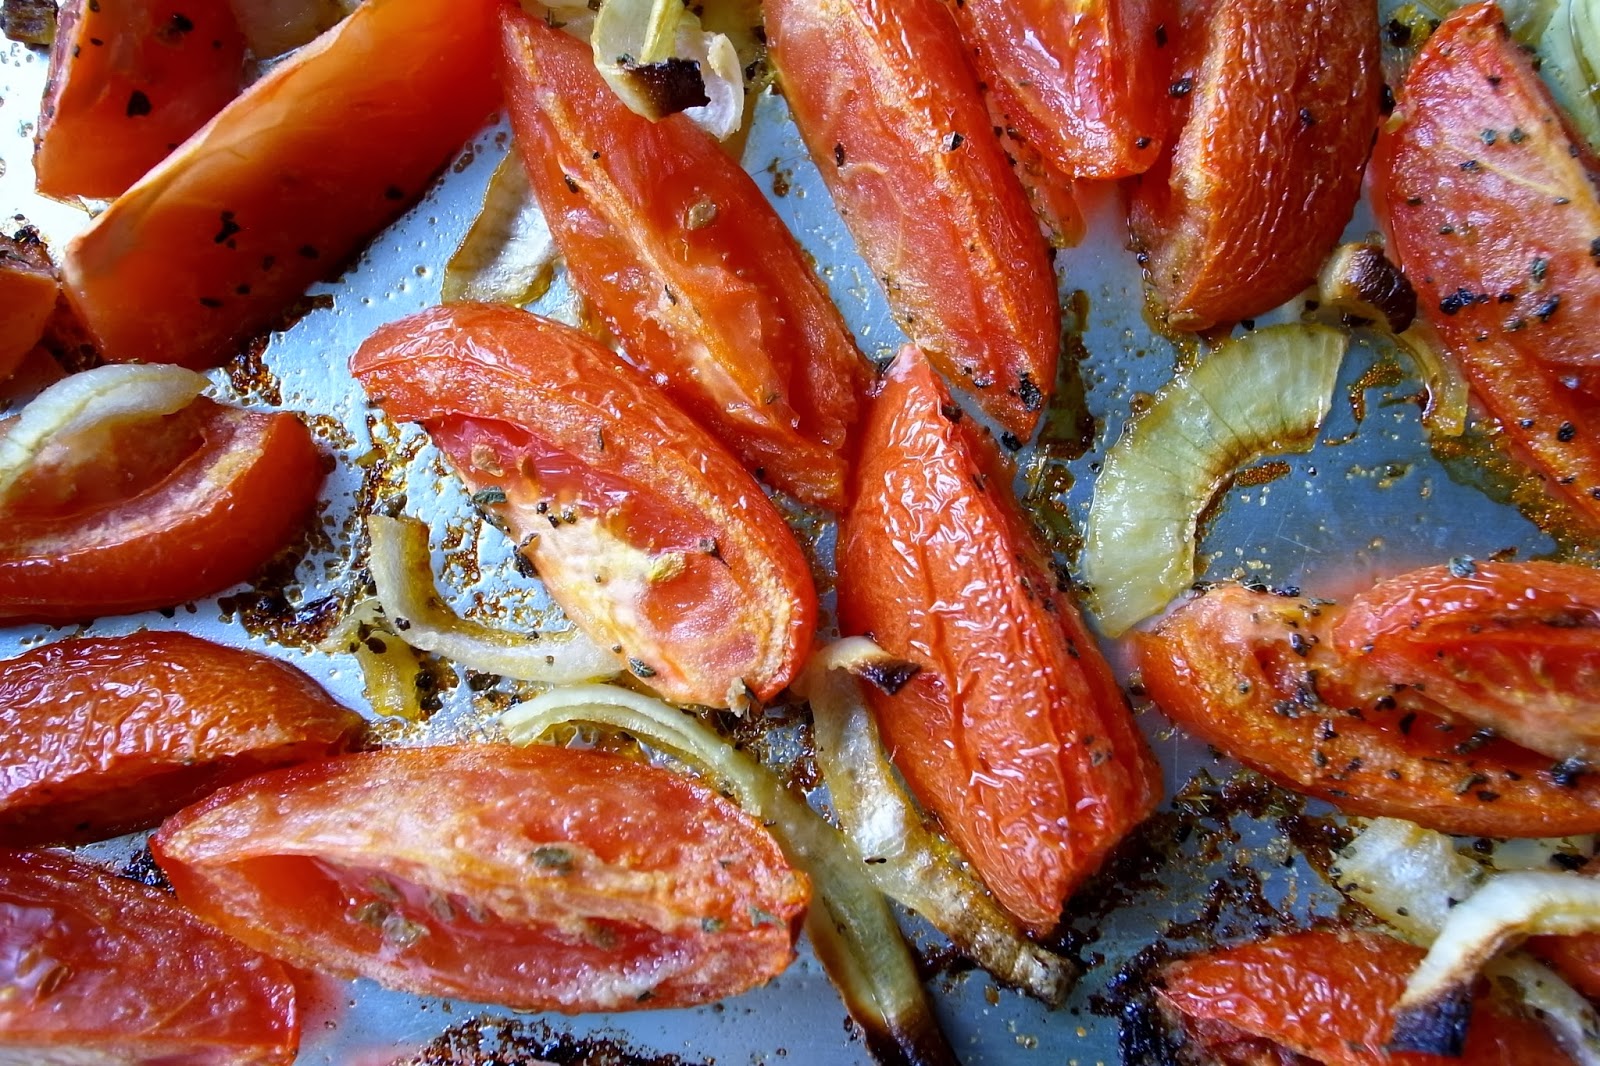
Don't forget to add as much of the caramelized
juices from the pan.
Roasted Tomato Soup
Ingredients:
  • 2 pounds ripe tomatoes, rinsed and sliced
  • 1 medium onion, sliced
  • 1 teaspoon garlic powder (or 3 garlic cloves, smashed)
  • 1 teaspoon dried oregano
  • 2 tablespoons olive oil
  • 2 cups vegetable or chicken broth (more or less depending on preference for thickness)
Directions:
Heat oven to 400. Place tomatoes, onions, garlic, oregano and oil on a baking sheet. Toss to coat.
Roast tomatoes for 20-30 minutes, they will be shriveled and the juices will have started to caramelize. Put the contents of the pan, including all the yummy bits that can be scraped off the pan, into a blender. Add one cup of broth and blend. Careful as the contents will be hot. Continue to blend, adding additional broth until desired thickness is reached. Serve warm with grilled cheese or BLT, I'm hungry!

Yield: 4 servings

Note:
There are endless possibilities for flavor additions to this soup. For a heartier meal, I have added chicken and garbanzo beans and even grilled corn and shrimp!

Pin It

Saturday, February 1, 2014

Chickpea and Black Bean Burgers

Beans are one of my staple items in my pantry. Beans are full of fiber, protein and are very low in cholesterol, they also contain a variety of vitamins and minerals including iron. They are a versatile ingredient and my boys love them. I almost always make these the day after this Black Bean Soup, it makes for a super flavorful burger.
Top with caramelized onions, melted brie and
arugula  for a mouthwatering dinner.
Chickpea and Black Bean Burgers
Ingredients:
  • 1 15-ounce can chickpeas, rinsed
  • 1/2 cup cooked black beans
  • 4 scallions, trimmed and sliced
  • 1 egg (vegan sub: ½ an avocado)
  • 2 tablespoons all-purpose flour
  • 1 tablespoon chopped fresh oregano or ½ dried
  • 1/2 teaspoon ground cumin
  • 1/4 teaspoon salt
  • 2 tablespoons extra-virgin olive oil, for cooking
  • Buns
  • Toppings of choice
Directions:
Place chickpeas, beans, scallions, egg (or avocado), flour, oregano, cumin and 1/4 teaspoon salt in a food processor. Pulse, stopping once or twice to scrape down the sides, until a coarse mixture forms that holds together when pressed. (The mixture will be moist.) Form into 6 patties.
 
Heat oil in a large nonstick skillet over medium-high heat. Add patties and cook until golden and beginning to crisp, 4 to 5 minutes. Carefully flip and cook until golden brown, 2 to 4 minutes more. Let cool slightly before serving. They are kinda crumbly when very hot.

yields: 6 patties

-These make awesome sliders as well!

Pin It